ElEd: Online Integration & Management

6.1 Online Integration and Management in the Elementary Classroom
Online integration is at the very heart of blended teaching. It has to do with how you combine your in-person classroom with online activities (the baker mixing dry and wet ingredients from Chapter 1). Because the main component of blended learning is integrating online and in-person activities, online integration is a good place to begin thinking about blending your classroom.
This is where you, as an elementary teacher, can consider what specific online practices can help you address the problems of practice you encounter when teaching the different content areas (you would have identified problems of practice in Chapter 5). The more examples of blended teaching you have personally seen and the more experience you have with online and blended teaching, the easier this process will be for you. But even if you are just starting out, don't worry! This chapter will help you explore ideas and possibilities.
Although blended teaching can seem overwhelming, experienced blended teachers say that the best way to go about this process of starting to blend is to think big but start small. Small beginnings allow you to wet your toes in the process, focus on specific pedagogies and activities, see the benefits and drawbacks, and make improvements on a small scale without becoming overwhelmed by the process. Go ahead, test the water—you will be swimming in no time!
6.2 Thinking Big: Blended Learning Models
One way to start to “think big” is to consider the different blended learning models used to organize your classroom. These blended models are only guides and can be adapted based on your context and students’ needs. We will only briefly highlight a few of the models that are most commonly used in the elementary classroom, but for a more detailed review of each of the blended learning models, see Chapter 2: Online Integration in K-12 Blended Teaching: A Guide to Personalized Learning and Online Integration.
6.2.1 Flex Model

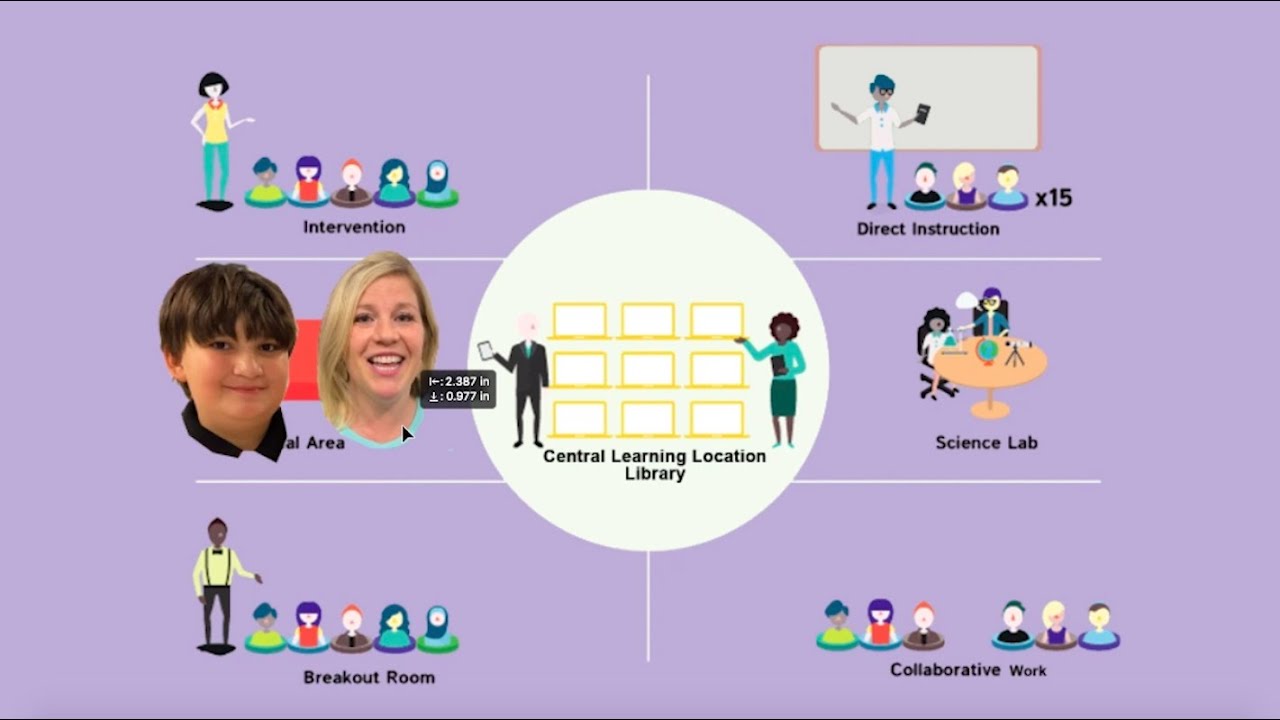
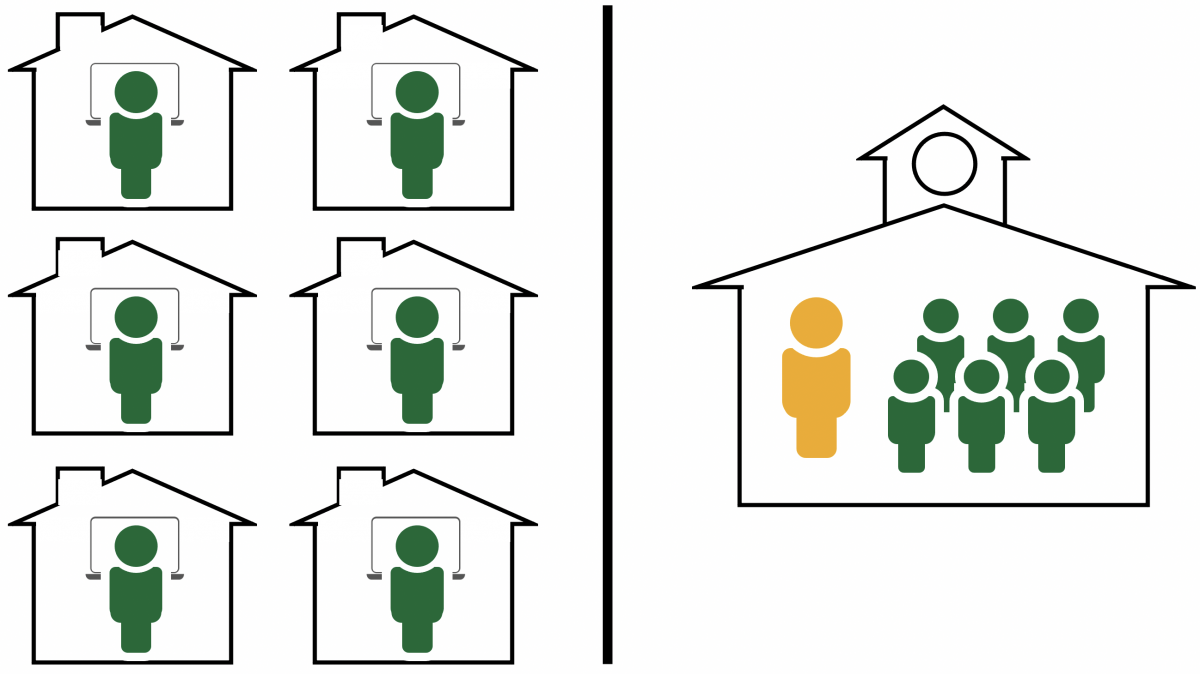
There are lots of different approaches to the flex model, from relatively simple to highly complex. What all of the approaches have in common is that “online learning is the backbone of student learning,” allowing students to fluidly work through learning activities at their own pace. Since the teachers are not delivering the instruction or direction, they can act as facilitators and spend their time working with students one-on-one or in small groups.
The Flex model could be as simple as students using an adaptive learning software to develop literacy skills. That software can provide teachers with data that they use to provide targeted support. Similarly, teachers can create their own online learning modules on a website or learning management system and provide enough scaffolding and direction that students can complete the activities at their own pace.
The flex model can also be highly-complex with multiple facilitators who help students through complicated tasks. For instance, the video below shows how the 6th grade teachers at Agnew Middle School combined to implement a passion-based project using the flex model.
Teachers Talk: Teaching Differently (:57)
Reflection question: What can you take from this large-scale implementation and apply to your blended classroom?
6.2.2 Lab or Whole Group Rotation Model
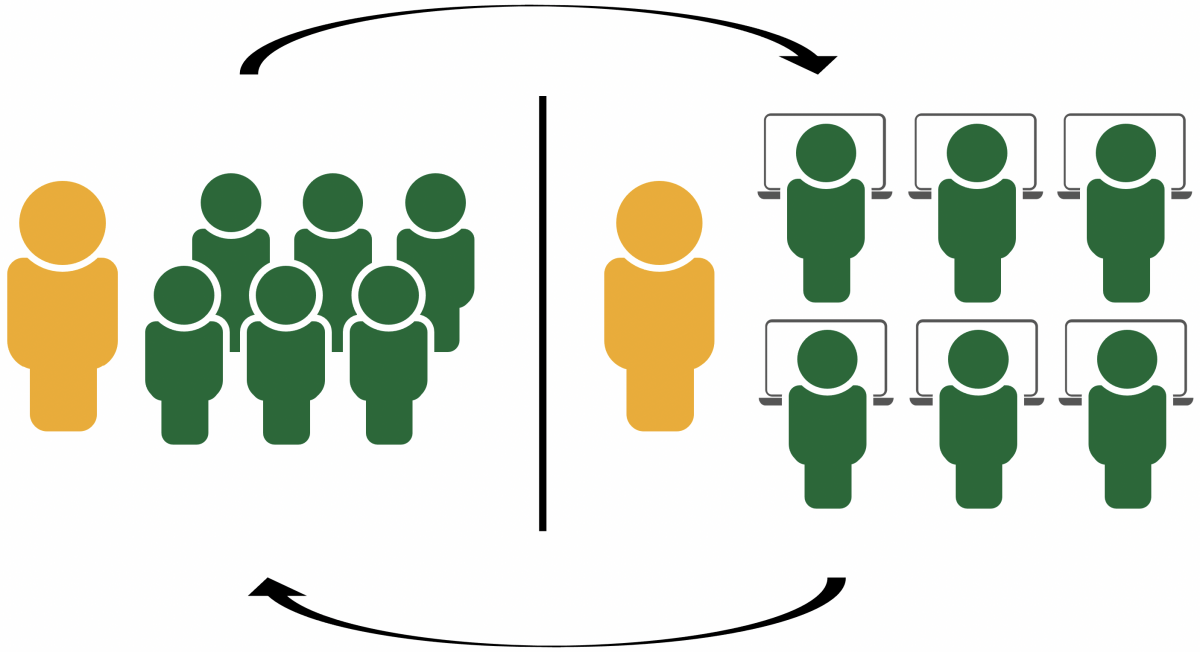
The Lab or Whole Group Rotation model is perhaps the simplest blended model, one that we have seen for decades. In this model, all of the students in the class rotate between the classroom and a computer lab. When all students in the class have access to their own device in the classroom, teachers don’t need to leave their classroom to to to a computer lab but can rotate the entire class from an activity that doesn’t use technology to one that does. An important criteria in this model is that there are meaningful connections between the off-line and online activities. The following video shows an example of whole group rotation in a high school but you can imagine who it might look in your elementary classroom.
Whole Group Rotation – Blended Learning with Catlin Tucker
Reflection question: In this video we see a an example of whole group rotation in a high school classroom. What would a whole group rotation look like in your classroom?
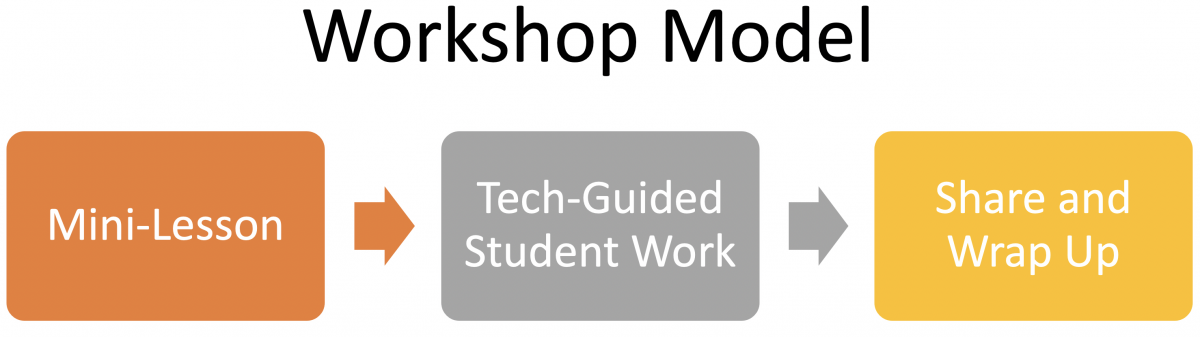
One adaptation of the whole group rotation is the workshop model. Workshops typically start with a mini-lesson with direct instruction or guided practice. Students apply what they learned either independently or collaboratively. The workshop then ends with a share or wrap-up activity. The workshop model, such as a writing workshop, has long been used without technology but became popular during the pandemic when teachers were tasked with teaching some students online and in class concurrently. Similar strategies can be used when all students are in the classroom by using technology to guide student work between the mini-lesson and sharing portion. However, technology can also be used in all phases of the workshop.
6.2.3 Station Rotation Model
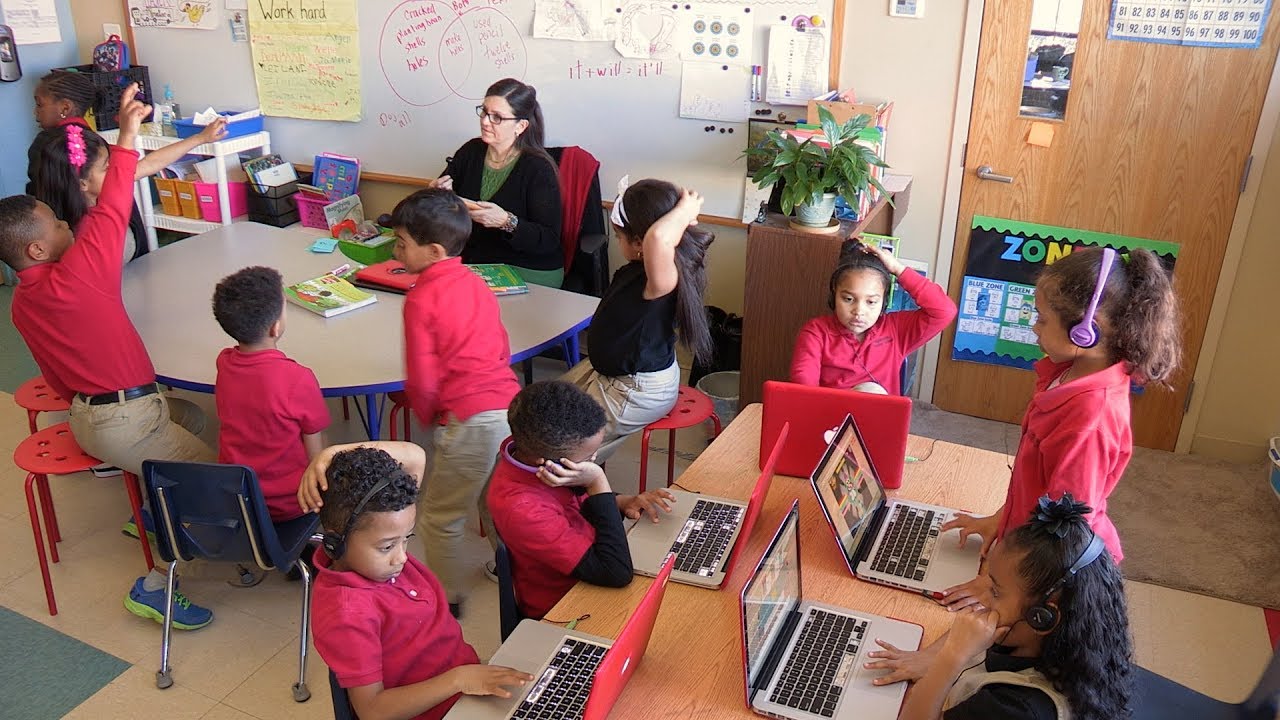
The station rotation model is perhaps the most commonly used model at the elementary level. This will be especially familiar to you if you’ve ever done rotating stations in your classroom such as the Daily 5. Rotating stations are great for elementary teachers because it affords them the opportunity to work with students one-on-one or in small groups. The station rotation blended model is different because in at least one of the stations, students are learning using technology. When it’s done well, the learning program that students are using in their individual time center will provide the teacher with important assessment data that they can then use to differentiate their instruction when the student comes to their center. Often only one station requires the students to use technology so this model is particularly helpful when each student doesn’t have access to a device at the same time.
This model is also highly adaptable and may look different for you compared to the teacher next door teaching the same learning objectives. It can be set up in a way where students have choice in their path of their learning and the stations they access, or you can set up a schedule for when students are working on certain tasks at a specific time. The following is one example that may help to spark ideas for how you could use the model.
Station Rotation: Differentiating Instruction to Reach All Students
Reflection question: Station rotations are fairly common in elementary classrooms. What ideas did this example spark that you can use to start or improve station rotation in your classroom?
Your expectations may also differ based on the subject being taught. For instance, in math you may give students flexibility for what practice stations they access while in Language Arts you may be more purposeful with your grouping to ensure you meet with certain students all at the same time for small group reading and writing.
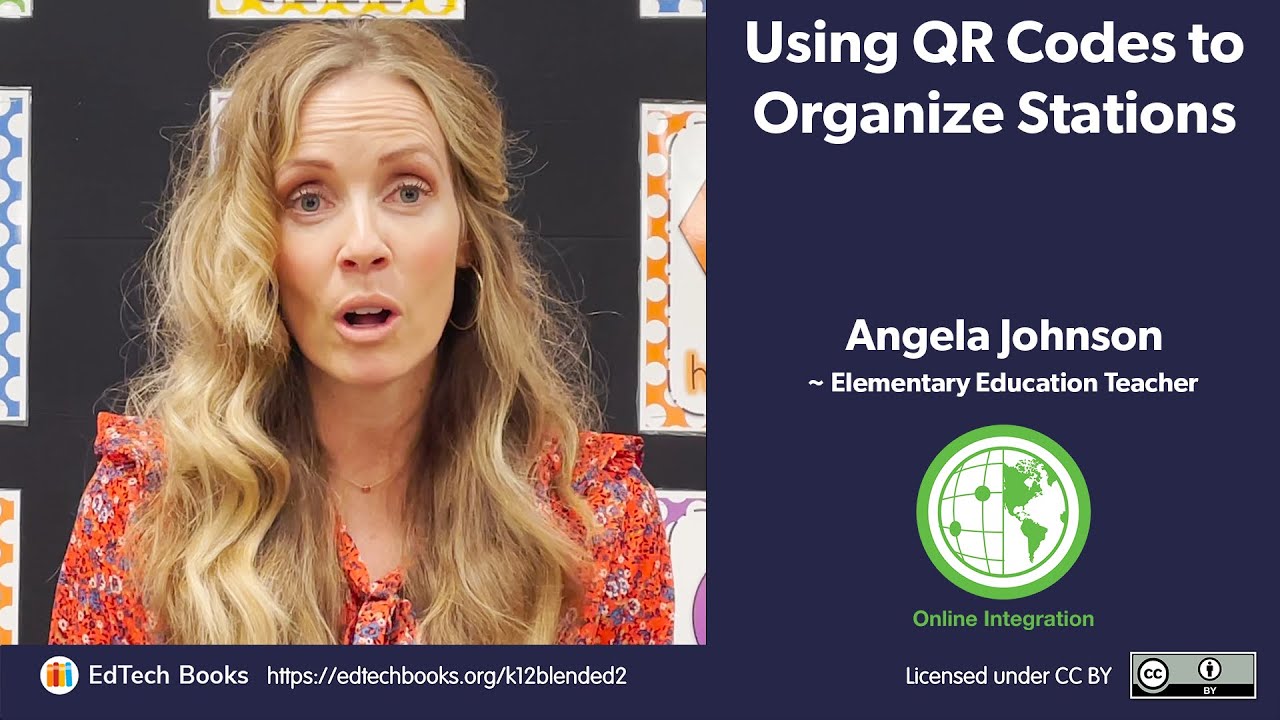
The stations can be organized differently based on the technology being used. For instance, Angela Johnson’s kindergarteners use iPads that students can easily take from center to center. To help organize and guide their center time, Angela uses QR codes (see the video below).
Teachers Talk: Using QR Codes to Organize Stations (2:38)
Reflection question: How could you use technology such as QR codes to help organize your students’ learning in a station rotation model?
6.2.4 Flipped Model
The flipped classroom allows the learning of a new skill/concept at home for homework—commonly by watching videos—to allow for practice, application, and discussion in the classroom. Don’t worry, if you choose to try this model out you do not need to create all the videos! You can find great already-made videos on platforms such as Khan Academy and YouTube. Some platforms such as EdPuzzle make watching videos more interactive by requiring students to answer questions while they watch. A downfall to this however is it requires students to have access to technology at home. As a result, some teachers have adapted the flipped model by having students watch the videos in the classroom, as seen in the following video. Similarly, some teachers may find that the station or lab rotation models are a better approach.
Flipped Classroom: Tracey Gillies
Reflection question: How could you adapt the flipped learning model for your classroom?
Videos are critical for the flipped classroom but can also be an important part of any blended learning model. It’s never been easier to create videos using screencasting tools and other free programs. In the video below, Chrissy McLaughlin shares how and why she created videos for her math students.
Teachers Talk: Creating Videos to Teach and Review (4:45)
Reflection question: How could videos help you to better use the in-person time that you have with students?
In the video below, Dr. Chawana Chambers shares some insight on how to decide which learning model is right for your classroom or school. She stresses the importance of selecting a model with equity in mind.
Administrator Advice: Equity in Blended Learning (6:09)
Reflection question: How do issues surrounding equity impact the bended learning model that you adopt?
6.3 Starting Small: Planning for Blended Lessons
It can be challenging to know where to start. In the video below, 5th grade teacher, Bridgette Joskow shares how focusing on one activity or using one tool at a time to elevate her student learning helped build her student’s capacity and her student’s confidence when introducing blended learning!
Teachers Talk: Think Big, Start Small
Reflection question: How can you make small changes that lead to a larger impact?
As you plan blended learning activities, it can be tempting to simply digitize what you've always done. While there can be some advantages to using technology in this way, often it's better to reimagine new possibilities that the technology affords, as Madiha Siddiqui describes in the video below.
Teachers Talk: Teaching Differently
Reflection question: How can you teach differently to make the most of blended learning?
Now that we’ve thought big by reviewing some blended learning models, let's take our first small step and plan a blended learning activity by doing the following:
- Identify the standard(s) and the learning objective(s) that you are interested in blending as well as the problems of practice that can arise when teaching them.
- Think about activities, both in-person and online, that could support the student learning. The following questions can help:
- How/when will students be using virtual tools vs. hands-on tools?
- What classroom structure will this subject area have set up (small group, partner work, whole group or stations)?
- When will students be interacting with each other and when will they be interacting with the teacher?
- How can the online activities and the in-person activities connect?
- Choose one of the activities you have considered and create a blended lesson.
Let’s explore some examples for how this process might work. In the first example, we’ll explore an example for grades K–2 and in the second example, we’ll explore an example for grades 3–6. The teachers in these examples explore several activities that could be blended. You have a similar chart in your Blended Teaching Notebook.
Write a brief statement about why you want to blend your classroom. Which purposes and outcomes are you most interested in for your blend? Access your Workbook here. Make sure you save your copy where you can access it as you go through the ElEd chapters.
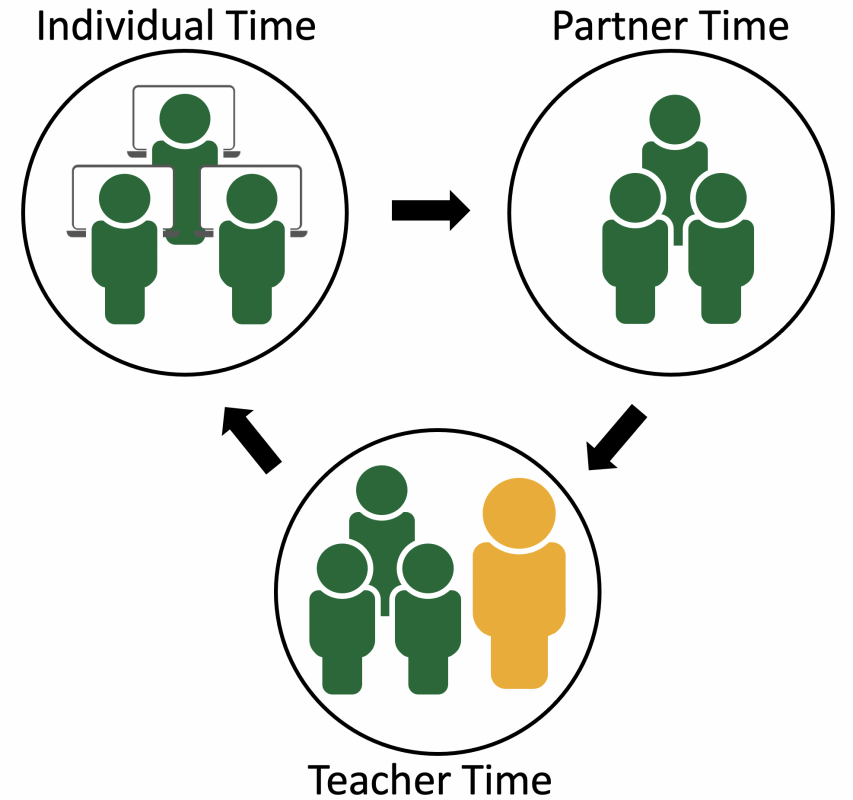
A common problem of practice in the lower elementary classroom is that students require differentiated instruction and personalized attention from the teacher. Elementary teachers are well aware that time is critical throughout a school day and there never seems to be enough of it. Blended and online learning creates opportunities to use time in the best possible ways—working with small groups of students. For instance, elementary teachers commonly use a station rotation model to make the best use of their time with students. There isn’t one correct way to set up stations, but one approach is to have three stations—a station where students can collaborate with partners, a station where students can receive individualized instruction from computer programs, and a station where teachers work with students.
Below is an example of how a 2nd grade teacher may plan a language arts block that allows opportunities to cross the curriculum with social studies standards through an approach called station rotation centers.
Content Area: 2nd grade Language Arts and Science
Learning Objective: Students will be able to identify key details that support the author’s points and understand that living things are part of a system. Class Structure: station rotation centers:
- Independent time—students work by themselves on an activity tailored to their personal needs.
- Teacher time—students meet in a small group with the teacher for explicit teaching/guided reading groups.
- Partner time—students work together with a partner on a skill/skills.
Student–Content InteractionsIndependent Time |
|---|
Online Activities:
|
| In-person Activities: Students read a text, identifying key details about living things' roles in a system. Students write or draw details about the living things mentioned on a graphic organizer, each living thing having its own section. |
| Connection: Both activities provide students with the opportunity to gain knowledge about living things, whether they are reading it themselves or using the aid from the teacher created video. Later, students will be able to take their details from their graphic organizer or from Jamboard to choose one of the living things from the article to write 3–5 sentences that support how a living thing is part of a system. |
Student–Student InteractionsPartner Time | |
|---|---|
Online Activities:
| |
In-person Activities:
| |
| Connection: The work the students do on jamboard and with their partner will prepare them for a productive in-person group discussion about the key details and for being able to plan an outline for their detailed sentences. |
Student–Teacher InteractionsTeacher Time |
|---|
Online Activities:
|
In-person Activities:
|
| Connection: The teacher will respond online to the Jamboards, asking a question that can cause the student to think more deeply about the living thing or consider another piece of evidence. They will use what they learned from their Jamboards and discussion board to guide their in-person meeting and to later give feedback in small groups. |
Content Area: 5th Grade Language Arts and Science
Learning Objective: Students will be able to identify cause and effect text structures in narrative nonfiction to create their own narrative nonfiction of an ocean organism interacting with the living and nonliving parts of its ecosystem.
Class structure: Whole group reading with station rotation.
Stations: Small group reading, independent reading, research/planning (writing)
Student–Content Interactions |
|---|
Online Activities:
|
In-person Activities:
|
| Connection: Students will be planning and researching organisms in the ocean, while also learning about cause and effect in nonfiction. This will allow students to write their own narrative nonfiction about the role their ocean organism has in the ecosystem it lives in and how an ecosystem relies on all of its members (living and nonliving) to thrive. |
Student–Student Interactions | |
|---|---|
Online Activities:
| |
In-person Activities:
| |
| Connection: The work students do on the Padlet will support the work of their classmates, as well as allow students to be able to begin identifying members of the class focusing on similar organisms/ecosystems. In person students will be able to come up with a game plan for their projects and use Google Docs to be able to work simultaneously on the same project. Google Docs also allows the teacher to be able to keep tabs on student’s work and leave feedback and suggestions. If students chooses to work alone, they can use the Padlet to identify students who they can get feedback from and cross check research with based on the ocean organisms/ecosystem they are researching. The small reading/writing groups during language arts stations will provide students a strong understanding of an ecosystem as a whole as well as allow them to explore various types of text structures which they will use to structure the script of their podcast or video. |
Student–Instructor Interactions |
|---|
Online Activities:
|
In-person Activities:
|
| Connection: The teacher will provide background information while teaching reading and writing skills in small groups that students will then take and apply to their projects. The teacher will also leave feedback and prompt questions to guide students to think about the importance of ocean organisms and the interactions those organisms have with their environment. |
6.4 Deciding What To Do In-person in an Elementary Classroom
Teachers Talk: How I Think Through My Day (3:27)
Reflection Questions: How do you think about your day when planning lessons? How can you incorporate blended teaching into your planning?
Blended learning is the strategic combination of online and in-person modalities. But how do teachers decide which activities to do online and which to do in person?
One way to begin answering the question of what can be done most effectively in person is to look at your strengths as a teacher, the needs of your students, and the types of activities that lend themselves to the best use of the in-person and online spaces. Know yourself, your students, and your subject matter well enough to determine what you want to preserve for the in-person space and what can be moved to the online setting.
Once you know how you can best use the in-person space, you can begin to explore ways to use the online space. Answers to the following questions may help you decide:
- Can I put some instruction online so I have more time to work with students individually or in small groups?
- Can putting an activity online increase student participation?
- Can I use the online space to allow my students to personalize the pace, path, time, place, or goals of their learning?
- How can I use the online space to target individual learning needs?
- Can I use the online space to help students increase ownership of their learning?
- Can I use the online space to give my students access to materials they wouldn’t otherwise be able to have?
- Can I use the online space to teach the same concept in different ways, so learners will have more than one option in their learning?
- Can I use the online space to allow for greater learner-learner interaction and collaboration?
- Can I use the online space to adapt or differentiate materials to meet different students’ needs?
- Are there new ways I can use the in-person space when I put some of the instructions and activities online?
As you begin to plan online learning activities it’s helpful to create an online platform. Many school districts provide teachers with a learning management system (LMS). If that’s not the case for you, there are several free tools that you can use to organize learning activities and directions. For instance, in the following videos Chrissy McLaughlin shares how she uses free Google tools to create rich and interactive online learning platforms.
Teachers Talk: Establishing Classroom Routines (3:55)
Reflection Question: How can you help your students to manage their passwords?
Teacher Talk: Using Digital Notebooks to Organize Students' Learning (1:51)
Reflection Question: How could you integrate digital notebooks into your students' learning?
6.5 Planning Blended Routines and Behaviors
Establishing routines in a blended classroom is crucial. Routines will help students to
- understand when and how to move around the classroom,
- how to access an LMS or other online programs,
- how to log in and out,
- where and how to store hardware,
- how to communicate civilly and respectfully,
- how to turn in assignments is essential to creating a usable blend.
In addition, making plans for how to manage off-task behavior can prepare you for situations that are sure to arise.
Process for Implementing Routines in a Blended Classroom:
- Decide specifically the kinds of behavior and routines you want to put in place.
- Spend the first two or three weeks really drilling and practicing those routines.
- Set clear expectations.
- Decide what you will do to help students who have a difficult time meeting the expectations. How will you respond to them?
- Evaluate your plan and make adjustments as needed.
One virtual tool that many elementary teachers know and love is ClassDojo. Check out the video below to learn how Class Dojo has helped Angela Johnson manage and encourage effort in her classroom!
Teachers Talk: Using ClassDojo to Manage and Encourage Effort (3:18)

Reflection Question: How can you use technology to track and encourage student effort?
In Table 1 below your mentor teachers share tips they have learned and implemented that have helped them establish routines to manage their classrooms. As you read through them, think of your classroom. Are any of these tips appropriate for your setting? What ideas come to mind of ways you can effectively manage your own classroom?
Table 1
Blended Learning Routines
Blended Learning Routines—Teacher Tips | |
|---|---|
| Student Movement |
|
| Hardware Management |
|
| Software Management |
|
| Student Questions |
|
| Classroom Configuration |
|
| Off-task Behavior |
|
| Other |
|
Elementary teachers say they typically spend four to six weeks at the beginning of the year establishing routines and expectations and teaching students how to use the technology. They also do not roll out all expectations/routines at once. Think about what routines are an absolute must during the first week of school and which expectations can come later. Sometimes expectations are needed earlier than usual. Therefore, you can implement a routine through an authentic teachable moment! Routines should be revisited and modeled both by the teacher and students throughout the year, especially after long school breaks! Yes, setting up expectations in an explicit and meaningful way to manage your classroom. You can feel like it takes a long time, but it will pay off to ensure a smooth running classroom that will lead to increased opportunities for interaction and personalization in the blended classroom.
Lastly, try your best to be consistent in your implementation of expectations and routines. If something is not working, ask your students for feedback! Don’t be afraid to say, “Does this routine work for you? Why or why not? How can we make this class run more smoothly?” If something is not working for you, it most likely isn't working for your students.
Below are some video tips from kindergarten teacher Angela Johnson and 5th grade teacher Chrissy McLaughlin on how they set learning expectations in their classrooms!
Why I Blend: Managing Student Passwords (1:49)

Reflection Question: Can you help your students to manage their passwords?
Teachers Talk: Setting Expectations for iPads (2:05)
Reflection Question: How can you set expectations for technology use?
Teachers Talk: Establishing Classroom Routines
Reflection Question: How would you need to adjust your classroom routines for the blended classroom?
Teachers Talk: Managing the Technology (4:29)
Reflection Questions: What are some of the challenges you have in managing technology? How can routines help?
Teachers Talk: Grounding Students in Digital Citizenship (1:55)
Reflection Question: How do you help your students to develop digital citizenship skills?
Teachers Talk: Managing Technology in the Classroom (2:40)
Reflection Question: What might you need to teach your students about using technology?
In the next chapter you will begin to explore online interactions in your blended teaching.


This content is provided to you freely by EdTech Books.
Access it online or download it at https://edtechbooks.org/k12blended_eled/eled_olim.