Headers
This article provides an overview of how to create and organize headers in EdTech Books.
Create a Heading
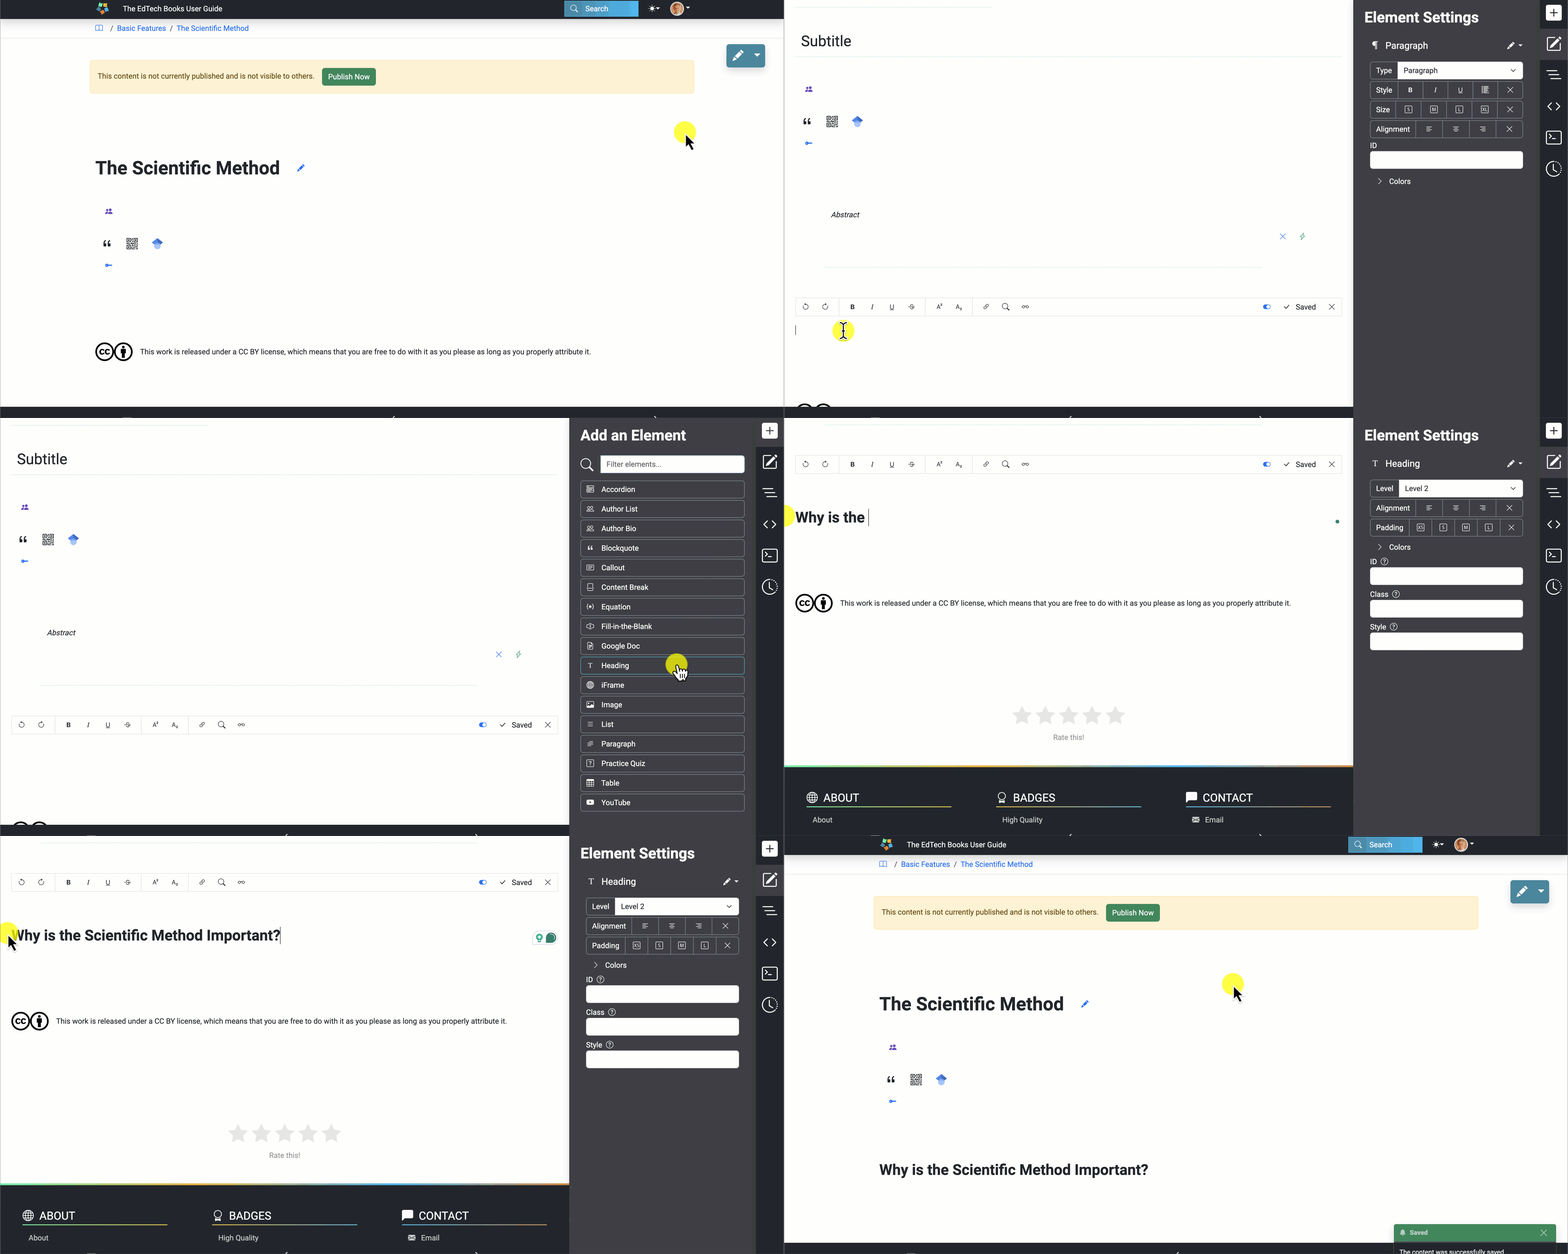
To create a heading:
- Start on a page of content.
- Open the editor by clicking on the pencil editing icon.
- Select the area where you want to add a header.
- Click on the “+” button and select the heading element.
- Update the heading text.
- Click on the save button.
- Exit out of the editor by clicking on the “x.”

Change Heading Level
There are six heading levels, level 1 being the most general heading and level 6 being the most specific heading. A level 1 heading is reserved for the title of each page. But you can use levels 2-6 to help you organize your content.
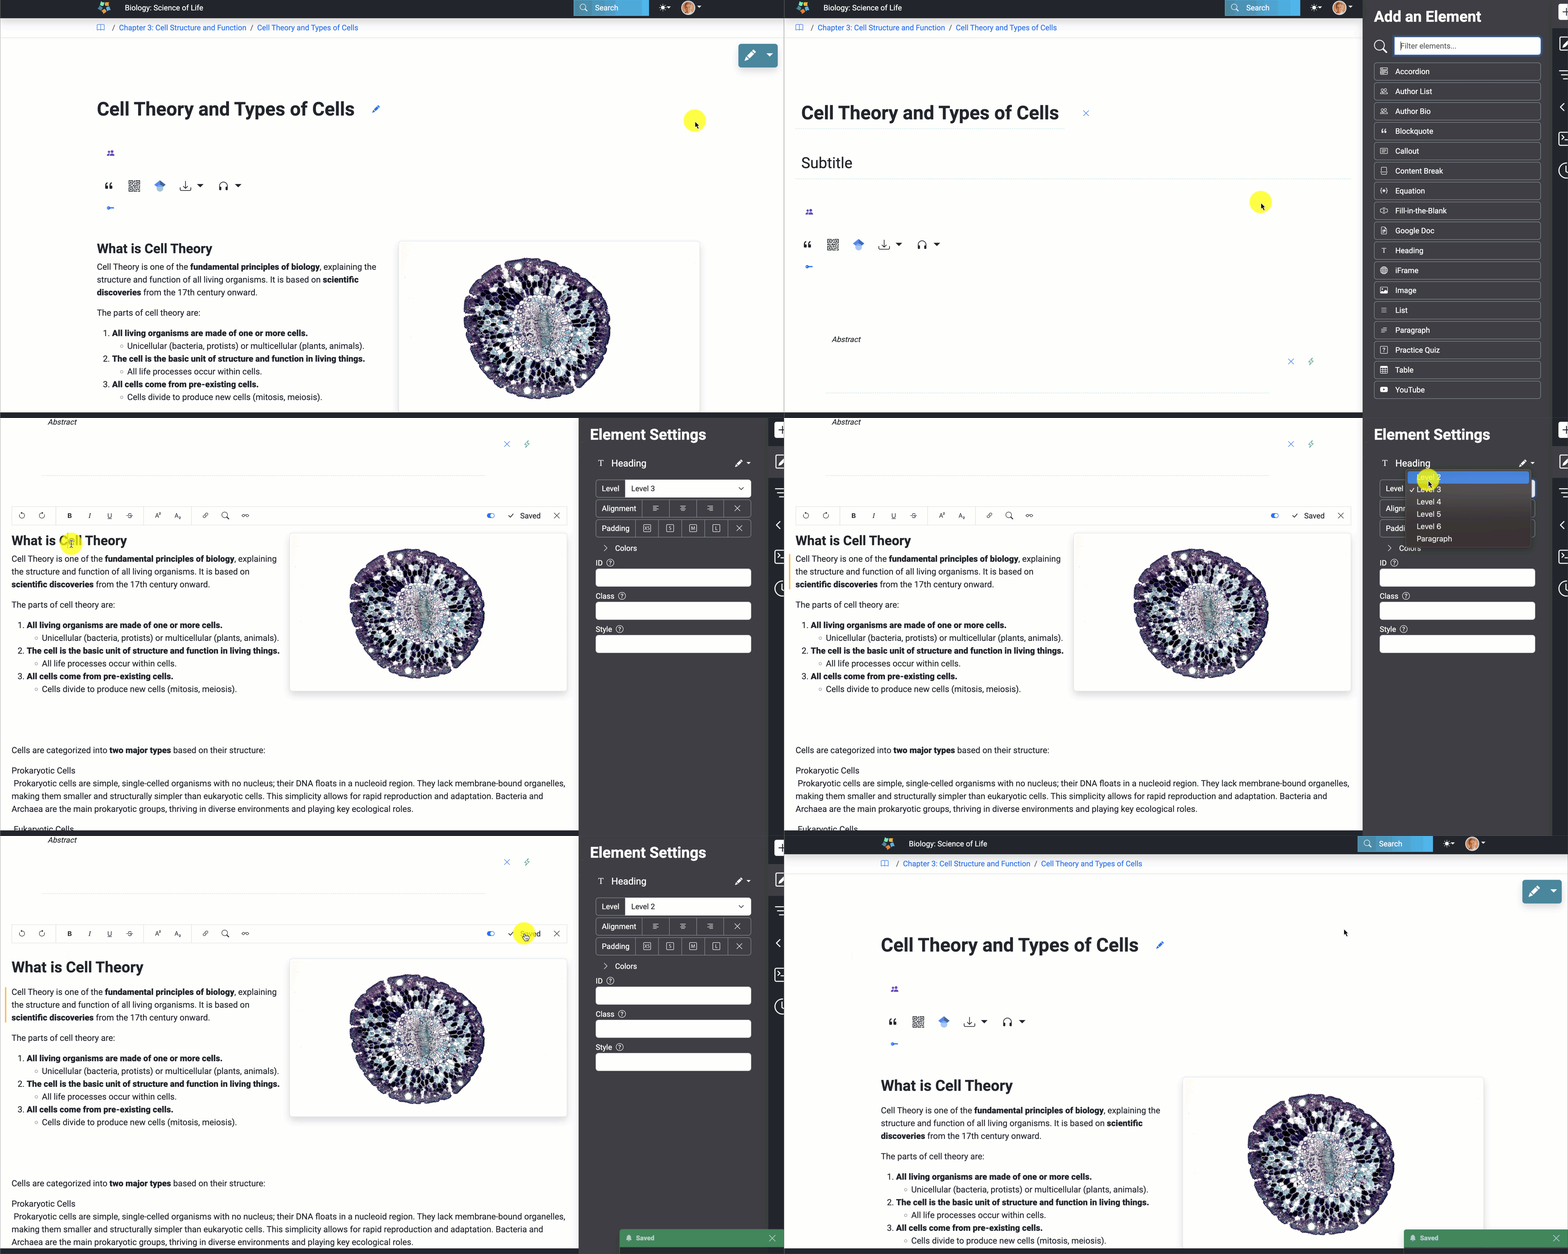
To change a heading's level:
- Start on a page of content.
- Open the editor by clicking on the pencil editing icon.
- Select the header you want to update.
- Update the heading level.
- Click on the save button.
- Exit out of the editor by clicking on the “x.”
